

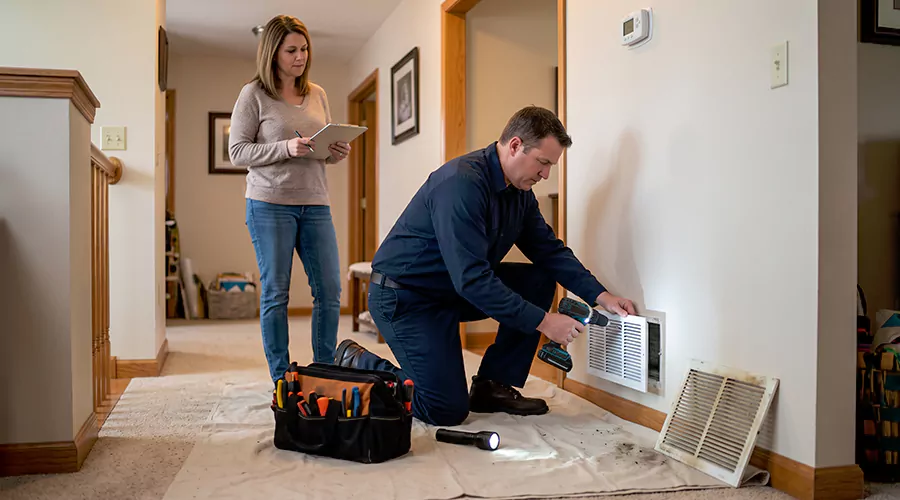
Replacing heating ducts involves inspecting the existing air distribution system, identifying damaged sections, selecting correctly sized replacement ducts, and installing them with secure connections, proper insulation, and adequate support. Our air duct replacement team handles these projects from inspection through final testing. The completed system should be checked for air leakage and airflow before normal heating operation resumes. Extensive replacement is best handled by a qualified HVAC contractor because duct sizing and installation affect the performance of the entire heating system.
Heating ducts distribute warm air from a forced-air furnace or other compatible heating equipment to rooms throughout a home. Supply ducts carry heated air toward registers, while return ducts bring room air back to the equipment. Together, these passages form a circulation system that must accommodate the airflow required by the heating equipment.
Over time, ducts may develop leaks, corrosion, damaged insulation, or physical restrictions. Flexible ducts can become crushed or disconnected, while rigid metal sections may deteriorate after repeated moisture exposure. These problems can reduce comfort and cause heated air to escape into unfinished spaces.
However, old or dusty ducts do not automatically need replacement. A sound metal duct with a leaking seam can often be repaired, while a severely damaged section may need to be removed. The goal is to correct the actual defect rather than replace usable materials unnecessarily.
What Are Heating Ducts?
Heating ducts are the air passages connected to a forced-air heating system. They carry heated indoor air through the building and provide a return path to the furnace or air handler. Most central heating systems use a combination of main ducts, smaller branches, and room registers.
A supply plenum connects the heating equipment to the main supply duct. Warm air moves through the trunk and branches before entering individual rooms. Return ducts collect air from the occupied space and direct it back toward the equipment for another heating cycle.
In homes with central air conditioning, the heating and cooling systems may share the same ductwork. Replacing these ducts therefore affects both heating and cooling performance. A contractor should evaluate the airflow requirements in both operating modes before changing the system.
Heating ducts are different from furnace combustion exhaust flues. A flue carries combustion gases outdoors and has separate material, venting, and safety requirements. It must never be replaced or modified using ordinary supply duct materials or installation methods.
When Should Heating Ducts Be Replaced?
Heating duct replacement becomes necessary when existing material cannot be repaired reliably or no longer provides the required airflow. Severe physical damage is a stronger reason for replacement than ordinary surface dust. The contractor should inspect the system and identify the affected sections before recommending extensive work.
Damaged or Collapsed Ductwork
Flexible ductwork can collapse when unsupported sections sag or heavy objects press against the liner. A permanently crushed passage restricts airflow and may leave the connected room without sufficient heat. Straightening a severely damaged liner may not restore its original shape.
A small bend in sound material may be corrected through better support and routing. However, extensive tearing or permanent compression generally calls for replacing the affected run. The replacement must be installed so the same problem does not return.
Rusted Metal Heating Ducts
Metal ductwork may develop corrosion when water repeatedly contacts its surfaces. Small areas of surface rust do not always require replacement, but substantial pitting and perforations weaken the passage. Multiple holes can also make reliable sealing difficult.
The source of moisture should be identified before new metal is installed. A leaking pipe or recurring condensation problem may damage replacement ducts if left unresolved. Repairing the water problem helps protect the new material.
Persistent Air Leaks
A leaking duct connection allows heated air to escape before reaching the intended room. When this occurs in an attic, crawlspace, or unconditioned basement, some of the heating energy may be wasted. Detached branches can produce particularly noticeable comfort problems.
A sound connection can often be repaired by securing the fitting and applying approved sealing products. Replacement becomes more reasonable when the material surrounding the connection is damaged or no longer supports a durable repair. Repeatedly adding sealant to a failing section is not a permanent solution.
Incorrect Duct Sizing
A heating duct may be structurally sound but too small to carry the required airflow. This can cause inadequate heating, excessive duct noise, or high system static pressure. The problem may become more noticeable after installation of different heating equipment.
Replacing an undersized duct with another of identical size can leave the original problem unresolved. A qualified contractor should evaluate the system's airflow requirements and develop an appropriate replacement layout. ACCA Manual D provides recognized residential duct-sizing methods for this work.
Moisture-Damaged Insulated Ducts
Insulated ducts may require replacement when water has damaged the internal material. The Environmental Protection Agency advises that wet or moldy fiberglass duct material should be removed and replaced because ordinary cleaning cannot reliably restore it. This is different from sound bare metal ductwork, which may be cleanable or repairable.
A contractor should establish the cause and extent of the moisture problem. Replacing the affected material without correcting the source of water may result in recurring damage. Not every stained duct needs replacement, so the actual material condition matters.
What Materials Are Used to Replace Heating Ducts?
Residential heating ducts are commonly made from galvanized sheet metal, insulated flexible ductwork, or approved fiberglass duct board. Each material has advantages and limitations that influence where it should be installed. The replacement should be suitable for the equipment's operating temperatures and the applicable mechanical code.
| Duct Material | Typical Application | Main Consideration |
|---|---|---|
| Galvanized sheet metal | Main supply trunks and rigid branches | Durable and requires sealed joints |
| Insulated flexible duct | Suitable branch connections | Needs careful support and gentle bends |
| Fiberglass duct board | Approved trunks and plenums | Must remain protected from moisture |
| Approved rigid duct products | Specialized installations | Must meet applicable listing and code requirements |
| HVAC mastic and listed closure materials | Suitable seams and connections | Must be compatible with the duct material |
| Duct insulation | Ducts outside conditioned spaces | Must meet local insulation requirements |
Rigid metal ducts are often used for larger trunks because they maintain their shape and can accommodate several branches. Flexible ducts can simplify certain connections but become restrictive when compressed or sharply bent. The contractor should select materials according to airflow and installation conditions rather than initial cost alone.
Some heating equipment operates at temperatures that make particular duct products unsuitable near the equipment outlet. The installation must follow the product's temperature limitations and the equipment manufacturer's instructions. A material approved for a distant branch is not automatically suitable at a furnace connection.
How to Replace Heating Ducts Step by Step?
A heating duct replacement project should begin with inspection and design rather than immediate removal. The steps below describe the typical professional process for replacing damaged residential supply and return passages. Major changes to furnace connections, plenums, and return systems should be completed by appropriately qualified personnel.
Step 1. Inspect the Existing Heating System
Identify the heating equipment and trace its supply and return ducts. Examine accessible branches for loose joints, physical damage, rust, and deteriorated insulation. Note which rooms experience weak airflow or uneven heating.
The inspection should distinguish duct defects from equipment problems. A dirty filter or malfunctioning blower can restrict airflow even when the ducts remain sound. Photographs and measurements can help establish which sections need replacement and which can remain.
Step 2. Check the Airflow Requirements
Determine the airflow that the heating equipment needs and how it should be distributed among the rooms. The required duct dimensions depend on airflow, pressure loss, duct material, and the proposed route. A contractor should account for the complete supply and return system.
ACCA Manual D provides established principles for residential duct design. When the replacement changes branch sizes or equipment capacity, room-by-room heating and cooling load information may also be needed. The new design should correct known restrictions rather than copy inadequate existing dimensions.
Step 3. Prepare the Replacement Layout
Plan the location of new main trunks, branches, fittings, and return connections. A suitable layout minimizes unnecessary bends and provides sufficient space for the intended duct size. The installer must also identify framing, wiring, plumbing, and other building systems that could interfere with routing.
Flexible ducts should have routes that permit gentle curves and proper support. Metal ducts may require custom elbows or transitions to pass around structural obstacles. The plan should specify which existing registers and fittings will be reused.
Step 4. Check Permits and Safety Requirements
Local mechanical codes may require permits and inspections for significant duct replacement. The contractor should verify the requirements before work begins. Insulation ratings and approved sealing methods may also vary with the installation location.
Older duct wrapping can contain hazardous materials, including asbestos. If asbestos-containing material is suspected, it should remain undisturbed until qualified assessment and any necessary specialized work are arranged. Ordinary duct removal should not begin through unknown insulation.
Step 5. Shut Down and Isolate the Heating Equipment
Turn off the heating system before disconnecting ducts. Qualified personnel should follow the equipment manufacturer's electrical isolation procedures when working near furnace cabinets or air handlers. Recently operating equipment should be allowed to cool where necessary.
Fuel-burning furnaces require additional care around the heat exchanger and combustion venting. The combustion flue must not be disconnected as part of ordinary supply duct replacement. Any work involving gas connections or exhaust venting requires appropriate qualifications.
Step 6. Remove the Damaged Ducts
Detach the affected ducts carefully while supporting adjacent sections intended for reuse. Old metal ducts may contain sharp edges, while flexible ducts can release loose insulation if damaged. Debris should be controlled during removal.
Do not pull forcefully against an air handler connection or register boot. A damaged fitting should be repaired rather than reused without inspection. The removal process should also protect surrounding framing and electrical components.
Step 7. Inspect and Prepare Connection Points
Examine the exposed furnace plenum, main duct fittings, and register connections. Each connection must be structurally sound and compatible with the replacement design. An undersized or damaged collar should not be retained simply because it is already installed.
Connections should be prepared using appropriate mechanical fastening methods. Suitable sealing surfaces are important because airtight joints depend on both proper assembly and compatible sealing materials. The installer should correct defects before the new duct is attached.
Step 8. Install the Main Heating Ducts
When main trunks need replacement, install the new sections according to the approved layout. Rigid ducts should be supported by suitable hangers and secured at their joints. Transitions should avoid unnecessary restrictions that interfere with airflow.
The trunk should be positioned correctly before individual branches are connected. Poor alignment can create unnecessary bends or strain on branch fittings. The installer should also maintain required clearance from equipment and other building components.
Step 9. Install Supply Branches
Connect each supply branch to its intended trunk and room register. Flexible ductwork should remain extended without excessive loops or compression. The inner liner must be attached to the collar using approved mechanical fasteners and compatible sealing products.
Proper supports are especially important for flexible ducts. Department of Energy guidance generally recommends supports at intervals no greater than four feet, using straps at least 1.5 inches wide. Sag should not exceed approximately half an inch per foot between supports, subject to the manufacturer's instructions.
Sharp bends near fittings can restrict airflow. Additional support or a suitable rigid elbow may be needed to maintain an appropriate passage.
Step 10. Restore the Return Air System
The return ducts must carry enough indoor air back to the furnace for the intended blower operation. Inspect and replace any damaged return passages identified in the project. Return connections should be mechanically secure and airtight.
A return leak can draw dusty or unconditioned air from an attic, crawlspace, or wall cavity. This can affect both filtration and system performance. The new return system should connect the intended grilles to the equipment without relying on unintended gaps.
Step 11. Seal and Insulate the Connections
All appropriate duct joints should be sealed using HVAC mastic or approved duct closure products. Ordinary cloth-backed duct tape should not be relied upon as a permanent sealing method. Mechanical fastening and air sealing should both be completed.
Ducts located in unconditioned spaces need insulation according to local energy requirements. Insulation should cover fittings and connections without significant compression or gaps. Protective vapor barriers should also be restored where required.
A well-sealed duct can still lose heating energy when installed without adequate insulation in a cold space. Both conditions need attention.
Step 12. Inspect the Completed Installation
Check every new duct run for loose connections, missing supports, damaged insulation, or physical restrictions. Register boots and junction boxes should remain firmly attached. Any temporary openings made for installation must be restored.
The contractor should confirm that no ducts have become compressed during work on neighboring branches. This is particularly important in attics where flexible sections may be moved repeatedly. Problems should be corrected before normal operation begins.
Step 13. Test for Leakage and Airflow
A professional duct leakage test can identify openings that remain after installation. The technician should also check system static pressure and appropriate register airflow when required by the project. These measurements help determine whether the replacement is working as designed.
Heating equipment should not be forced to operate against a restrictive duct network. If the new layout produces abnormal pressure or inadequate airflow, the cause must be corrected. In homes with naturally vented combustion appliances, significant duct changes may also require appropriate combustion safety testing.
Step 14. Restore Heating Operation
After the ductwork and equipment have been reassembled, restore normal heating operation. The technician should confirm that the blower operates correctly and heated air reaches the intended registers. Any unusual noise or airflow problem should be investigated before the work is accepted.
The homeowner should receive a description of replaced sections and any relevant testing results. Keeping this information supports future maintenance and makes it easier to identify the new duct design.
Can You Replace Heating Ducts Without Replacing the Furnace?
Yes. Damaged heating ducts can often be replaced while the existing furnace remains in service. The new duct network must be compatible with the furnace's required airflow and operating characteristics. A duct replacement does not automatically mean the heating equipment itself needs replacement.
However, installing a different furnace can change airflow requirements. If the homeowner plans to replace the heating equipment soon, it may be useful to coordinate the duct design with the new system. Otherwise, ducts sized for an older furnace might require additional modifications later.
A contractor should assess equipment condition separately from duct condition. These are related systems but different replacement decisions.
How Much Does Heating Duct Replacement Cost?
Published U.S. estimates commonly place residential duct replacement between $1,400 and $5,600 for many projects. HomeGuide reports approximately $25 to $55 per linear foot, while smaller individual duct replacements may cost $270 to $500. Actual pricing depends on the location and amount of material being replaced.
An exposed basement system can be easier to replace than ducts hidden behind finished walls. Custom metal fabrication and substantial redesign can also increase cost. Insulation, removal, and final testing should be identified in the estimate.
| Replacement Work | Indicative U.S. Cost |
|---|---|
| Single straightforward duct run | $270–$500 |
| General duct replacement per linear foot | $25–$55 |
| Many residential replacement projects | $1,400–$5,600 |
| Extensive concealed or redesigned system | Site-specific quote |
These figures represent different project sizes and are not charges that should be combined automatically. A contractor should provide an itemized quote based on the actual system.
What Mistakes Should You Avoid When Replacing Heating Ducts?
Heating duct replacement can create new performance problems if the design or installation is incorrect. The most serious errors involve inadequate airflow and improper handling of fuel-burning equipment. A replacement should address the complete system, not only the visible damaged sections.
Avoid these mistakes:
- Replacing sound ducts solely because they are old.
- Installing new branches without checking the required airflow.
- Using materials unsuitable for the equipment's operating conditions.
- Confusing combustion exhaust flues with room-air ducts.
- Leaving sharp bends or crushed flexible sections.
- Using inadequate mechanical supports.
- Failing to seal supply and return connections.
- Using ordinary cloth-backed tape for permanent duct sealing.
- Leaving ducts in unconditioned spaces improperly insulated.
- Disturbing suspected asbestos-containing material.
- Ignoring return-air restrictions.
- Skipping leakage and airflow testing.
- Failing to evaluate combustion safety when major duct changes affect building pressure.
Correcting these problems after installation can require reopening finished spaces or replacing newly installed material. Proper design and inspection reduce that risk.
How Can You Keep New Heating Ducts in Good Condition?
New heating ducts should be protected from moisture and physical damage. Flexible branches must remain adequately supported, while metal ducts should not be exposed to recurring leaks. Any damaged insulation should be repaired before surrounding conditions cause further deterioration.
Check air filters according to the heating equipment manufacturer's recommendations. Return openings should remain unobstructed so the blower receives the intended airflow. During routine furnace maintenance, ask the technician to inspect accessible duct joints and supports.
If one room becomes noticeably colder than before, investigate the reason rather than immediately adding another register. A loose branch or new restriction may be responsible. Early inspection can prevent minor defects from becoming larger repairs.
Conclusion
Replacing heating ducts requires more than removing old material and installing new passages. The replacement must be correctly sized for the heating equipment, securely connected, properly supported, and insulated where necessary. Minor leaks may be repaired without changing the entire system, while severe structural damage can justify replacement. Combustion exhaust systems require separate safety procedures. Before scheduling the work, request a duct inspection and a design-based installation quote.